Arduino and Lift - controlling a servo motor.
Introduction.
I have been meaning to control devices from a computer for a long time. But for one reason or another, I never got to it, that is, until now.
About a year ago I found out about the Arduino project, it looked very interesting, but I didn’t want to learn yet another language, I wanted to use Scala for this, so I put the idea to the side.
But about two weeks ago, I decided it was time to try again, and see if I could use Scala with an Arduino board, and there was a way!
I found this blog post that uses java to communicate with an Arduino board, which is exactly what I needed.
Getting the parts.
I haven’t done anything with electric components since I left Argentina in 2001, so I went ahead I got all I needed from Amazon. Total price was $60, not bad.
- Servo Motor Hitec 33322S HS-322HD
- Arduino Uno Rev 3 Starter Kit
- microtivity 5mm Assorted Clear LED w/ Resistors
Adding some Lift to the project.
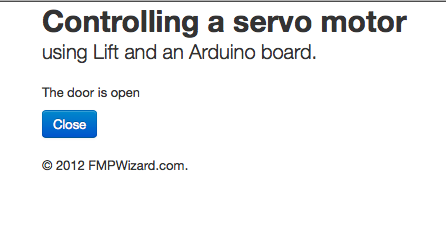
If I was going to control an Arduino using a computer, I had to use Lift. So I went ahead and wrote a simple Lift application that has one button and some text indicating what is going on.
Goals for this project.
- I wanted to control a servo motor using my cellphone.
- I didn’t want to have to write an Android application.
- I wanted to know if my “door” was open or closed.
- I wanted the UI to be simple but smart at the same time.
Did I get there?
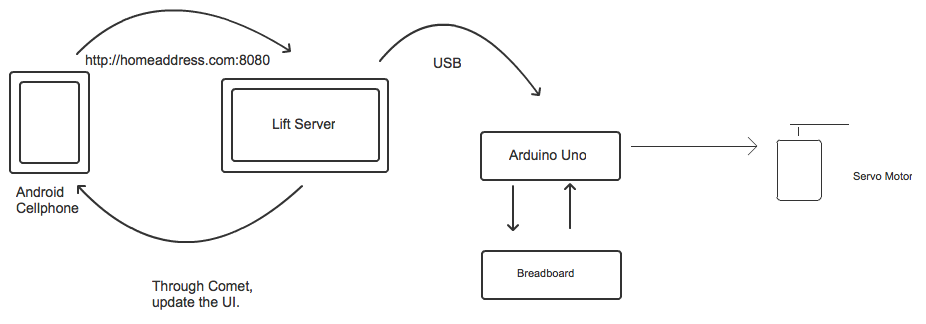
Yes! In a nutshell, the architecture is:
- From my cellphone (or any device with a browser), I access a Lift application running on my laptop.
- There is a USB cable from the laptop to the Arduino board.
- I’m currently using a breadboard to connect two LED’s, one green and one red, to indicate if the door is open or closed.
- And I also connect a servo motor to the Arduino board.
The Lift application.
I’m using Lift 2.5-SNAPSHOT because I’m using comet and I needed to communicate to comet actors from outside the current session. While it is possible to do so using Lift 2.4, 2.5 make it a lot simpler (plus, I added that feature :) ).
The idea of the UI is simple, there is one button that says “Open”, you click it and a message is sent to a LiftActor. This actor sends the “open” command to the Arduino board and then the servo motor rotates, plus it turns the green LED on.
Then, the LiftActor sends a confirmation message to the CometActor on the browser, and this CometActor updates a message on the browser to indicate that the door is open and it also changes the button’s label from open to close.
If you click the button again, it will turn the red LED on, rotate the servo motor in the opposite direction and update the text and button on the browser.
I didn’t want to have two buttons on the browser page. So this is one of the reason why I’m using Comet. Another advantage of using comet in this manner is that any browser, not just mine, gets the latest door status. This means that if I have two computers, and each of them have a browser pointing to my Lift Application, both would know any “status” update.
Final thoughts.
While this is a very simple and somewhat limited example, I think it is a great starting point, and it opens up a lot of possibilities.
In the future I want to explore the idea of controling lights and the ac at home.
I also hope that this post shows that there is a lot of technology available to every day people, and you can do pretty cool stuff without having to be a rocket scientist or having to spend thousands of dollars.
Where is the code?
The code is hosted on github, It is under the arduino branch. I included the Lift application and the Arduino code.
Feel free to ask questions on the comment section.
Notes.
I had some issues with the java library to communicate with the USB port, the solution was to run the jvm in 32 bit mode and copy the RXTXcomm.jar anf librxtxSerial.jnilib files from the Arduino IDE to /Library/Java/Extensions/ folder (I’m on a mac).
Video.
See the Lift application in action:
Thank you for reading and don’t hesitate to leave a comment/question.
Diego