Different ways to use Comet Actors in Lift (Part II).
With some bits of knockout.js
Update: I have updated the source code on the github branch, and there is part III, using AngularJS.
On my previous post, I gave an introduction of my javascript adventures (kind of). This post is about re-writing the sample chat application that comes with Simply Lift using three different techniques.
Technique I
The first technique is to inline JavaScript in your scala code. I’m keeping the chap application very simple and with some bugs, because the point here is to give you a taste of the different ways you can use JavaScript with Lift
When a message comes in to the comet actor, and you want to update the UI with this new message, we can use something like this:
case class NewMessage(message: String) extends JsCmd {
  override val toJsCmd = JE.JsRaw(""" $('#messages').append('<li>%s</li>')""".format( unquote( encJs( message ) ) )).toJsCmd
}
and then, the lowPriority function can be:
  override def lowPriority = {
    case data@ InboxMessages(v) =>
      msgs = data
      partialUpdate(NewMessage(v.last))
  }
This results in the browser getting javascript that looks like this:
try { destroy_F9099544081113FK2YO(); } catch (e) {}
try{ $('#messages').append('<li>Hello world</li>')
}catch(e){liftComet.lift_cometError(e);}
try { destroy_F9099544081113FK2YO = function() {}; } catch (e) {}
if (lift_toWatch['F9099544081113FK2YO'] !== undefined) lift_toWatch['F9099544081113FK2YO'] = '909954408785';
The important part to notice here is $('#messages').append('<li>Hello world</li>')
This works, but as you can see, we have a lot of javaScript in our comet code. And if the logic to add new rows gets a bit more complex, it would be harder to read, debug.
Technique II
We read some good books on JavaScript, get a few good tips from coworkers and now we move on to using events.
Now your message case class looks like:
case class NewMessageEvent(message: String) extends JsCmd {
  override val toJsCmd = JE.JsRaw(""" $(document).trigger('new-chat-message', %s)""".format( encJs( message ) ) ).toJsCmd
}
your lowPriority looks like:
  override def lowPriority = {
    case data@ InboxMessages(_) =>
      msgs = data
      partialUpdate(NewMessageEvent(data.v.last))
  }
So this is the same as on the previous section.
But now the JavaScript that is sent to the browser looks like this: $(document).trigger('new-chat-message', "Hello World!").
This means that Lift does not care about the presentation any more, all it does is trigger an event new-chat-message and pass as a String as a parameter.
And finally, to have all this working together, we need to look at the file trigger-js-event.js :
(function() {
  $(document).ready(function() {
    //Just like Lift removes elements with this class name
    $('.clearable').remove();
    $(document).on('new-chat-message', function(event, data) {
      $('#messages').append('<li>' + data + '</li>')
    });
  });
})();
This allows your team to split the work a bit more, you can have someone who is not very familiar with Scala/Lift take care of the UI, as long as you give them all the data they need (this is a simplistic example, but for more complex data structures, you could pass a json structure).
This is a lot better than option 1, but if each row has a more complex html structure, things could get ugly.
Technique III
Enter knockout.js (or angular.js or any other framework that does the same/similar things).
For the knockout example, this is the case class we handle on the comet side:
case class NewMessageKo(message: String) extends JsCmd {
  implicit val formats = DefaultFormats.lossless
  val json: JValue = ("message" -> message)
  override val toJsCmd = JE.JsRaw(""" $(document).trigger('new-ko-chat', %s)""".format( compact( render( json ) ) ) ).toJsCmd
}
Notice how we are sending a json object here. And we are also triggering a JavaScript event.
lowPriority is the same as in the other two examples, so I’ll omit it form here.
What the browser gets from the comet is:
try { destroy_F909954408546IFK3J4(); } catch (e) {}
try{ $(document).trigger('new-ko-chat', {"message":"Hello World!"})
}catch(e){liftComet.lift_cometError(e);}
try { destroy_F909954408546IFK3J4 = function() {}; } catch (e) {}
if (lift_toWatch['F909954408546IFK3J4'] !== undefined) lift_toWatch['F909954408546IFK3J4'] = '909954408848';
Again, the important part to notice is $(document).trigger('new-ko-chat', {"message":"Hello World!"})
Now, on a file called chat-knockoutjs.js I have:
(function() {
  $(document).ready(function() {
    //Just like Lift removes elements with this class name
    $('.clearable').remove();
    var chatMessages = new ChatMessages();

    $(document).on('new-ko-chat', function(event, data) {
      chatMessages.addMessage(data)
    });
  });

  ChatMessages = function() {
      var self = this;
      //This holds all our messages
      var messages = ko.observableArray();
      self.addMessage = function(newMessage) {
        //Here we add the new message to our array.
        //ko will automatically update our html as we add more items to this array.
        messages.push(newMessage);
      }

      try {
        ko.applyBindings({ messages: messages }, document.getElementById('chat-messages')[0]);
      } catch(e) {
        //ignore
      }
    }
})();
We can see that we are listening to an specific event with these lines of code:
    $(document).on('new-ko-chat', function(event, data) {
      chatMessages.addMessage(data)
    });
To connect this javascript to the html template, you need to add a few tags to your html files, this is the important part from the file chat-knockoutjs.html:
      <div id="chat-messages">
        Some chat messages
        <ul id="messages" data-bind="foreach: messages">
          <li data-bind="text: message">A message</li>
          <li class="clearable">Another message</li>
          <li class="clearable">A third message</li>
        </ul>
      </div>
Knockout side notes.
Note that on the js file we have ko.applyBindings({ messages: messages }, document.getElementById('chat-messages')[0]);
You will see a div with the id chat-messages on the html file.
Notice this line on the template <ul id="messages" data-bind="foreach: messages">. We are telling knockout that for each item on the messages array, it will need to duplicate the inner html (the li), and then take the value from the message field and use it for the text of each li item.
By now I hope you can see that ko lets you have as complex of an UI as you need to, in a very similar way that Lift handles templates and snippets using css selector transform.
Code sample.
You will find a complete chat application on github (note the branch name if you pull it locally).
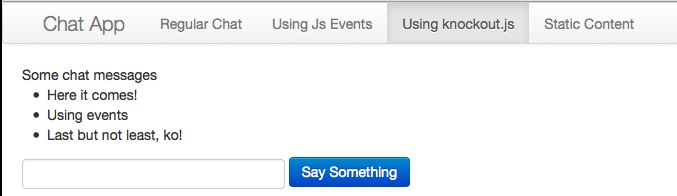
after you start the app, you will see the three implementations, each on its own page, so you can compare them.
Final note.
I hope you find this post helpful and see the power in passing some of the rendering responsibilities to the client.
As always, feel free to leave a comment here or send an email to the Lift mailing list.
Thanks
Diego