Since I found out my wife and I were having a daughter, I’ve been looking for the best way to teach her how to code. I knew I didn’t want to be pushy, I wanted to find the most natural way for this to work out.
Fast forward to the present, she is 8 and a few weeks ago she decided to sit next to me while I was doing code review at work (I love working remotely!).
As we both looked at code, I would explained here and there some changes, and what my role was as a reviewer and a few days later, I offered to teach her coding.
Pick a project
I wanted to make sure coding was going to be a fun activity for her, she had done the graphical drag and drop coding at school, using scratch, but she finds it boring.
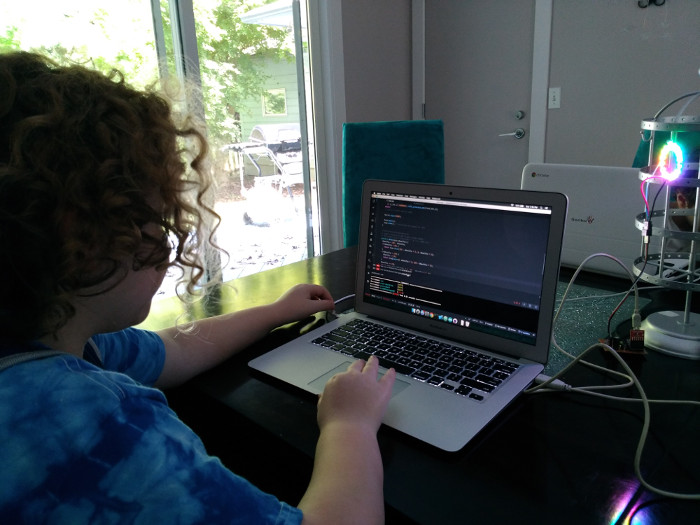
That’s when I decided to start with arduino, have some code affect the physical world. I had made her a lamp last year, with an arduino and the neopixels from adafruit, so we went over the code I had written, made sure not to get too deep into the details. My goal was to get her to make changes as soon as possible, transfer the code to the arduino and see the lights change color!
The very basic
The initial arduino file is here
I decided to skip the include lines and went straight to
#define PIN 11
My explanation there was that this line tells the arduino (mini computer), that all the commands will go out of that pin number, and I went ahead and showed her the different pins the actual arduino has.
Then we had:
uint32_t numOfLeds = 16;
Here is where I introduced the idea of variables, types and how to declare them.
Variables: They are like pockets, where you are allowed to put things in, but they have to always be the same kind. If you declare something as a number, you cannot put text in there. The pocket concept clicked for her right away.
uint32: This one was a bit more involved, I started by revising the idea that she knows numbers start at 0 and go up, 2, 3, 50, etc. And then I
told her how we also have numbers that go the other way, 0, -1, -2, etc. As I explained this, and pretty much every other concept, I made sure to
be as visual with my hands as possible, to help her “see” what I was saying. I didn’t go into the details that -2 is lower than 0, because that
detail is something we can explore later on, for now, she knows that we have at least two kinds of numbers, “regular” (positive) and negative numbers.
All that to explain the u in uint32 :)
Then I had to explain int, my explanation was that in a program, we can have many different kinds of “pockets”, and when we need to put “numbers” in it, the language likes calling them integers and int is just shorter.
I didn’t go into floats, she learned fractions last year at school, but not in the format of 0.5 but as in “half”. There is plenty we can do with
integers before we need to go into floats, so that will be for another day.
And I think this is key when teaching kids how to code, don’t overwhelm them with all the posibilities, explain just enough to do the work you have at hand, if they ask for more details, of course provide the answers.
Then we had the 32 to explain, here I didn’t feel it was necessary to be exact, so I just told her that she may see 8, 16, 32 or 64 and that each of
those were “limits” that tell the language what’s the highest number she can save inside the variable/pocket[1]. I made sure to tell her that it didn’t mean that 32 was the actual higest number she could save in there. She seemed ok with the somewhat vague description, so we moved on.
Then we moved all the way to:
void loop() {
Here I explained that this was the main function the arduino runs. That this was run from start to finish, and then back again, until we turned off the power.
Then we look inside the function and I pointed out that:
rainbowCycle(100);
meant that we “call” the function rainbowCycle and we pass a parameter, which is a value, like a pocket that has one single value.
and then we went to read the rainbowCycle function:
void rainbowCycle(uint16_t wait) {
  uint16_t i, j;
  for(j=0; j<256*5; j++) { // 5 cycles of all colors on wheel
    for(i=0; i< numOfLeds; i++) {
      hoop.setPixelColor(i, Wheel(((i * 256 / numOfLeds) + j) & 255));
    }
    hoop.show();
    delay(wait);
  }
}
The first session was getting long so I only explained that this was a function (pointed out the name), I didn’t explain the void in there
but told her about the wait parameter, that this was a way to make the function a bit smarter and this helps us change what the
function does.
From there, to the last line in the function:
delay(wait)
Here I told her that this line controls how fast the LEDs change their color, and that wait was the parameter the function expected, and then we went back to the loop function, so she could see which value we were passing right now.
At this point, she knew enough to make changes, so she got to change the 100 to other values, I showed her the buttons on the IDE to press to build the project and deploy it to the arduino.
In our case, we use Atom with the PlatformIO plugin.
Extras
Somehow she wasn’t tired yet, so I went ahead and told her we could also set just one single LED to turn on with a single color. She was really excited to try this out!
First step was to create a new funcion, here I told her we needed to decide if the function was going to give us any result or
simply “do something”, and as this wasn’t calculating anything for us, but instead if was going to turn an LED on, we just needed
to type void because this language uses “void” to mean “don’t give me anything”.
Then we picked a name, her choice was rainbowStop, as opposed to cycle, it would just stop after turning something on, side note, I like
her way of thinking :)
A lot of steps were mostly telling her step by step what she needed to do, like the fact that she needed to open and close parenthesis, because this was a function, but unlike the previous one, it didn’t need any parameters, because we didn’t need to make this function smart, not yet.
The first version ended up being:
void rainbowStop() {
  hoop.setPixelColor(1, hoop.Color(200,100,100));
  hoop.show();
}
I explained that the first parameter (1), was the LED number, and the rest was how you pick a color. I briefly explained how the numbers passed to the Color function went from 0 to 255, and that she was free to try any combination.
We then updated loop() to call our new function and the magic happened! we were controlling a single LED at will!
We took a break to get some water, walk a bit around the house and then back to the lesson.
Once back, I told her she could also change the colors of all 16 LEDs from the ring we had. But that she needed to type
hoop.setPixelColor(1, hoop.Color(200,100,100));
16 times. The look on her face was of horror!, and then she asked me if there was a way to do this in just one line. To me this question was perfect!
I didn’t have a one line answer, but we settled for 3, it was time to introduce her to for loops!
The new version ended up as:
void rainbowStop() {
  uint16_t x;
  for(x=0; x < numOfLeds; x++) {
    hoop.setPixelColor( x, hoop.Color(200,100,100));
  }
  hoop.show();
}
We went a bit over the type of x , uint16_t, she remembered the story about unsigned and how the language calls numbers integers. Then
I explained the for loop syntax and pointed out she would replace the “1” from our initial version for the “x” variable.
Then we built it, deployed it and saw it all working. At this point she had decided she liked the cycle effect better, so we commented out our loop() function so that it would call the original function, deployed and called it a day.
Looking back
I’m very happy how that lesson ended up, I didn’t practice everything I was going to tell her before hand, and tried to pay as much attention to her body language and facial expressions to see if I needed to explain any concept in more details or if she was ok.
At the time of this writing, we have had almost one session a day for over two weeks. I try to keep the sessions between 15 and 30 minutes.
[1] As I go along on each session, I make sure to use alternative words for the same thing, like calling a variable a pocket. For example:
Here we declare a variable, pocket to hold a value, a number, an integer.
I assume that this helps kids associate the technical term variable, with the more kid friendly word “pocket”, by making it part of a somewhat normal sentence.
Thank you for reading and don’t hesitate to leave a comment/question.
Diego